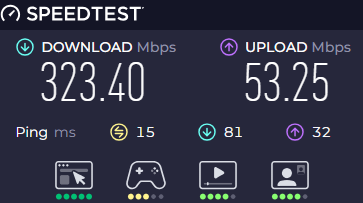
I tested the speed this morning on the speedtest website (as yes I know that RutOS has a speed test tool available) and the DL speed was 10 or less. I turned out my son was downloading a Steam game update which seemed to be taking all the bandwidth.
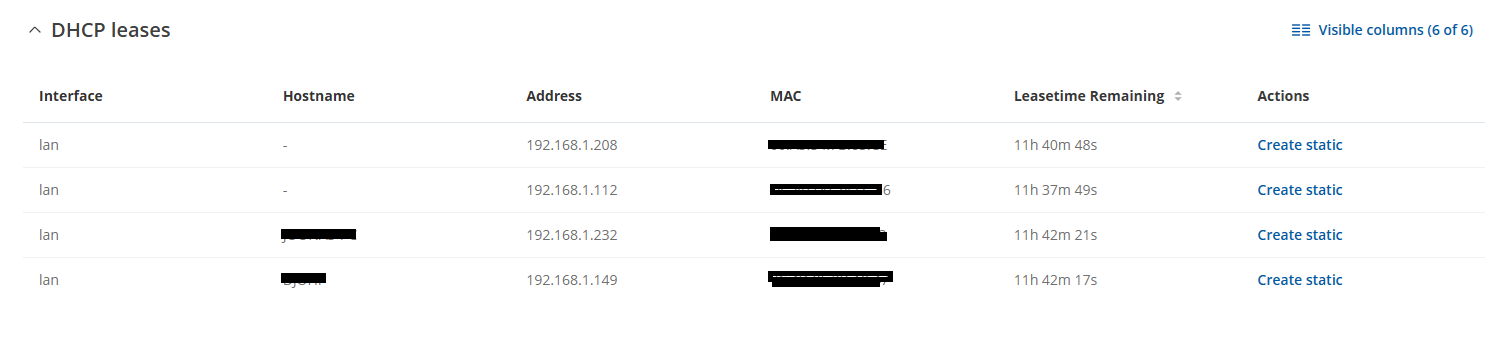
Of course one can set bandwidth limits inside the Steam application but I was wondering would it be possible to limit bandwith to client IPs listed in Status > Network > LAN?
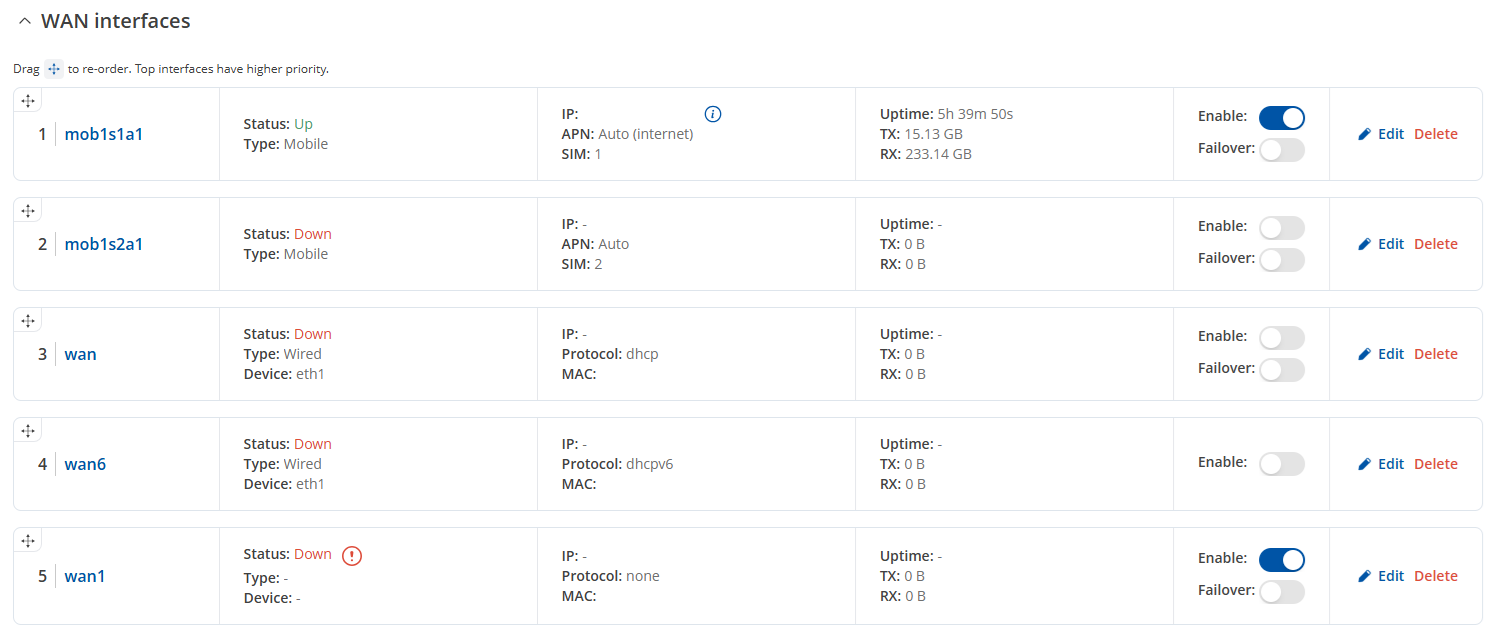
I’m aware of the Traffic Shaping options in Network > Traffic Shaping > SQM which appears to apply only to network interfaces in Network > WAN. I have only one WAN interface active for the single SIM in the device and all clients get internent through that so would that not just limit the DL speed of the whole interface and thereby affect every client?
Is there a RutOS method to limit bandwith to specific LAN hostnames or IP addresses? I found the post below which seems simple enough to use, is that still a valid soluton and would someone recommend it or is there another way?
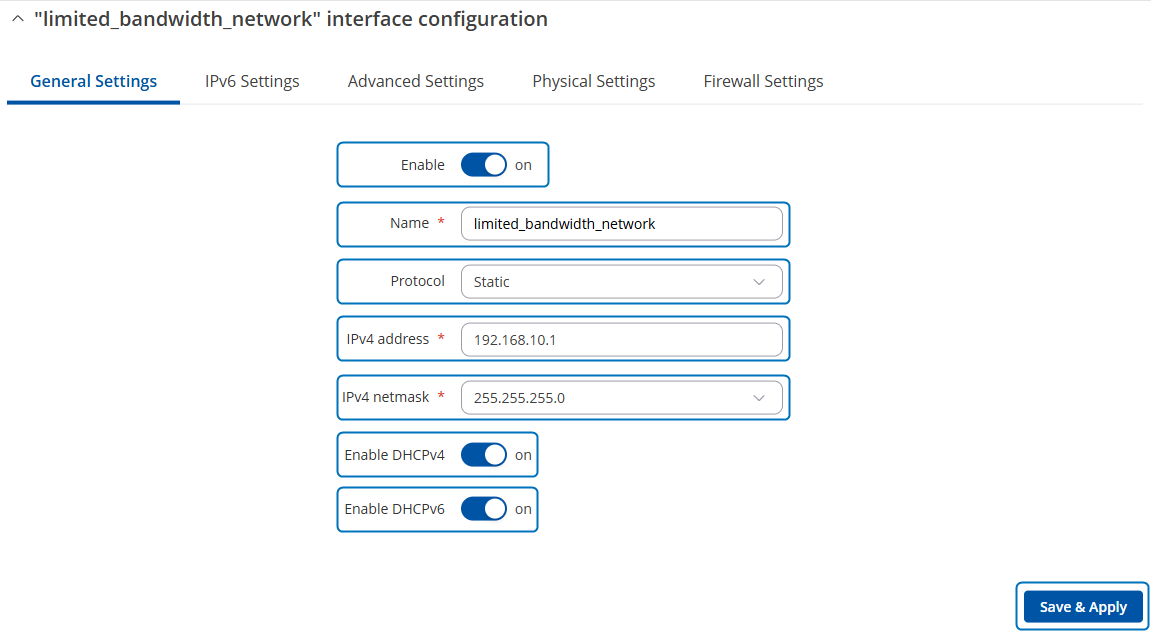
Apologies for the delay. In your case, in my view, a straightforward way to limit bandwidth for a specific host or network would be by using QoS (Quality of Service). This method allows you to shape traffic for a specific LAN interface rather than applying limits globally on the WAN interface. However, this approach would involve creating a separate VLAN network.
Here’s how to guide for implementing QoS using a VLAN-based approach:
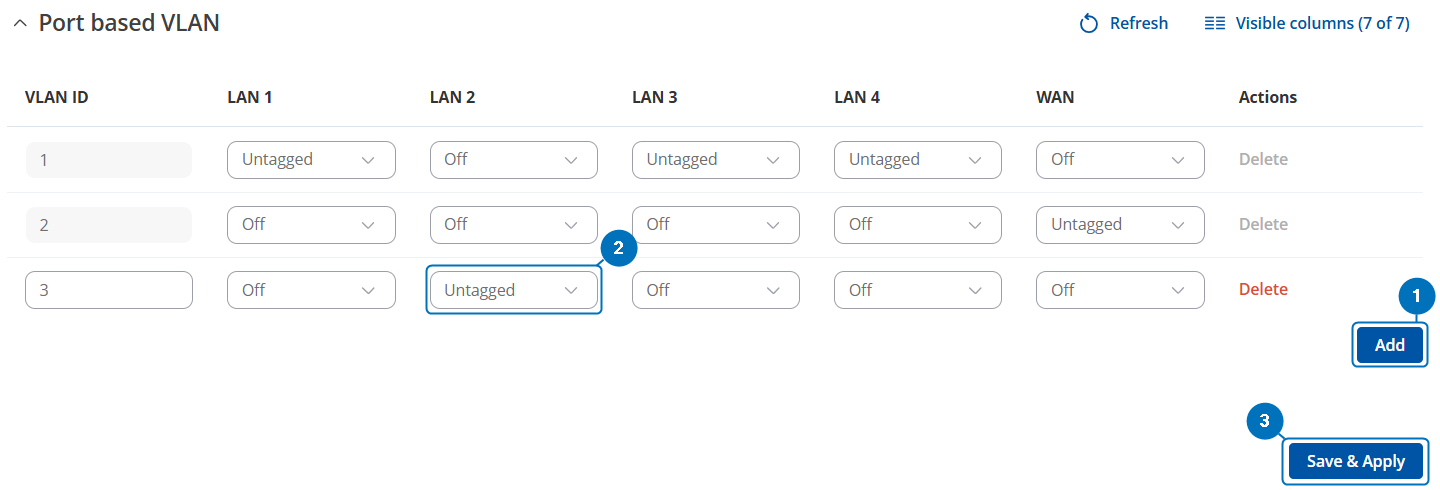
Step 1: Create a VLAN for limited network
Navigate to Network → VLAN
Press Add
Choose Port-based or Tag-based on created VLAN ID 3 (depending on how the client device is connected and your network setup)
Don’t forget to press Save & Apply after each step.
After this setup, any client connected to the specified VLAN will have their bandwidth shaped according to your QoS settings, leaving the primary LAN unaffected.
I hope this guide helps, and if you have any questions, let me know.
@anon65719490 no problem at all and big, big thanks, this is excellent!
There are a couple things I don’t fully understand. By default my RUTX50 RutOS VLAD ID 1 has LAN 2 Untagged, what does this mean and why is it not the same in your screenshot?
And having LAN 2 Untagged in VLAD ID 1 causes a conflict when I added VLAN ID 3 and set LAN 2 Untagged so am I supposed to untag that for VLAD ID 1? I am guessing this is what you did here hence VLAD ID 1 LAN 2 appears as “Off”
And then I don’t understand how to get a client to access the internet through this new LAN/VLAN/QOS setup since all clients are using the default LAN interface.