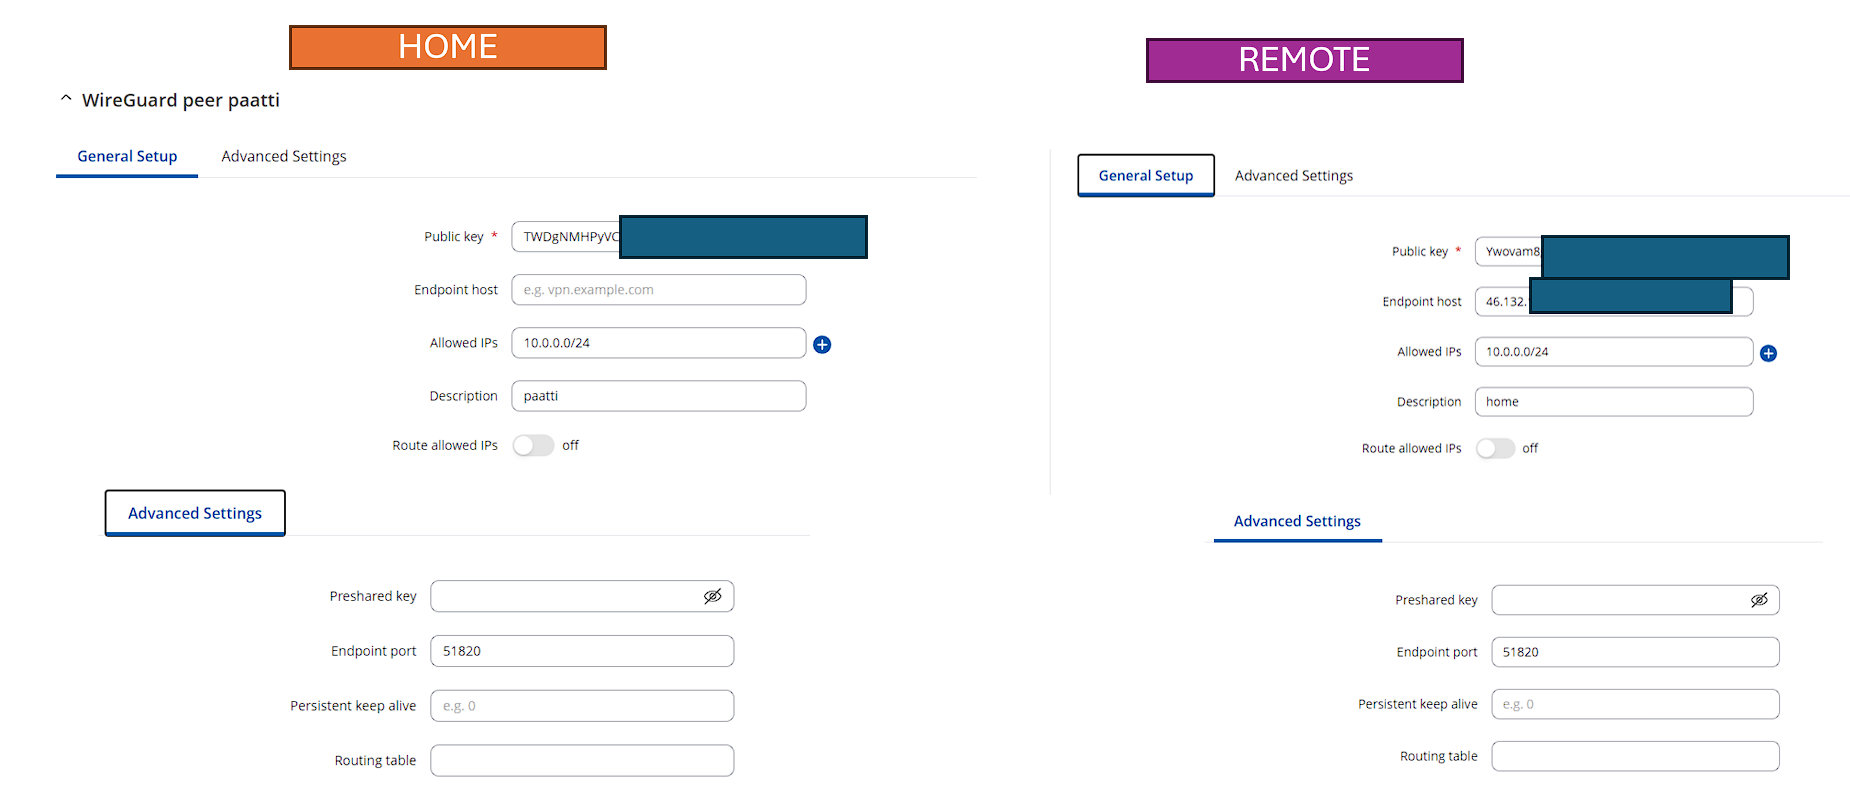
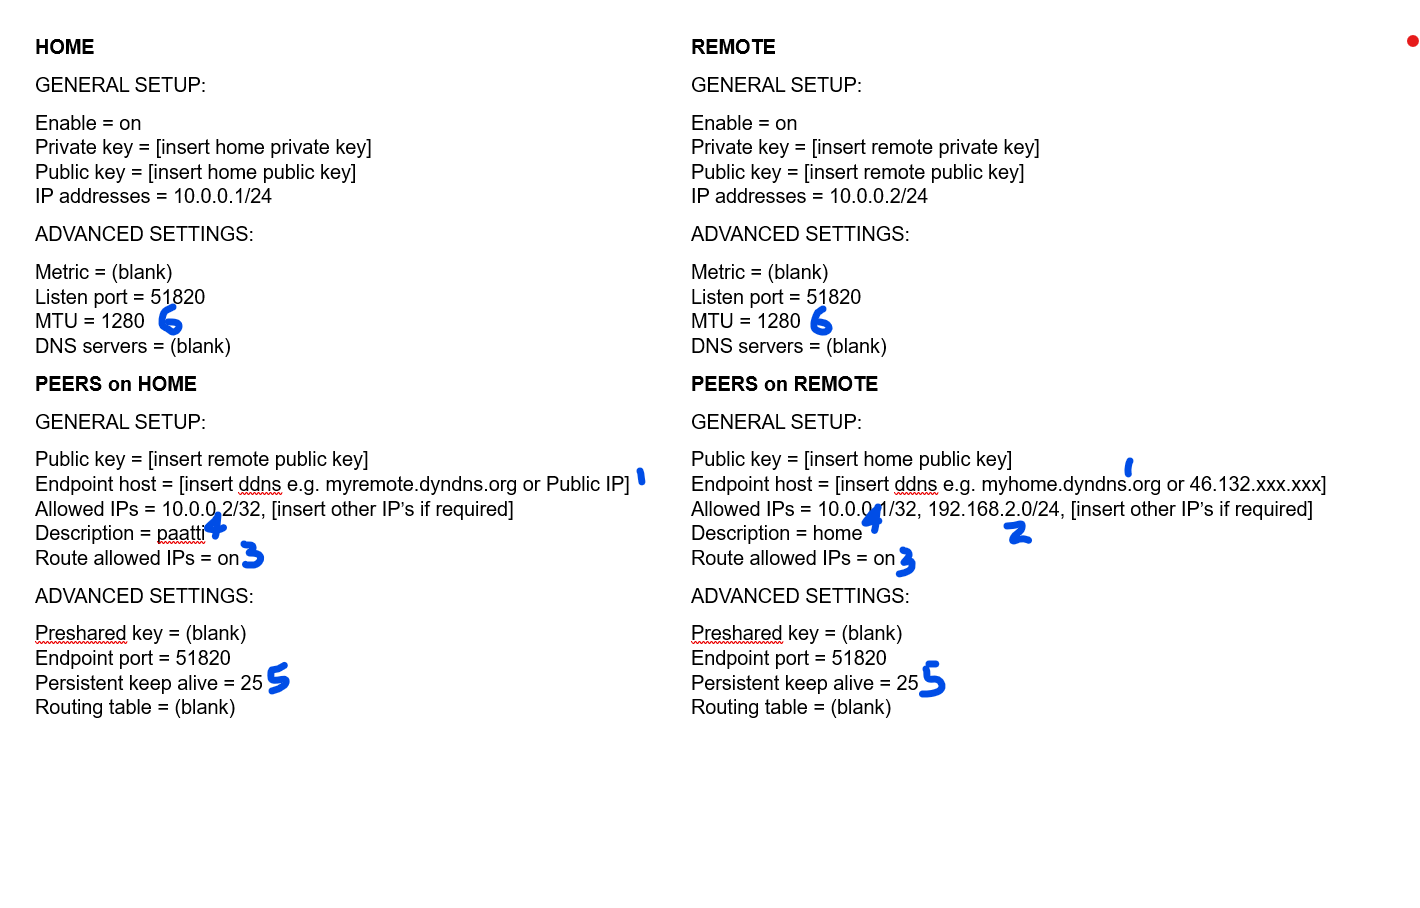
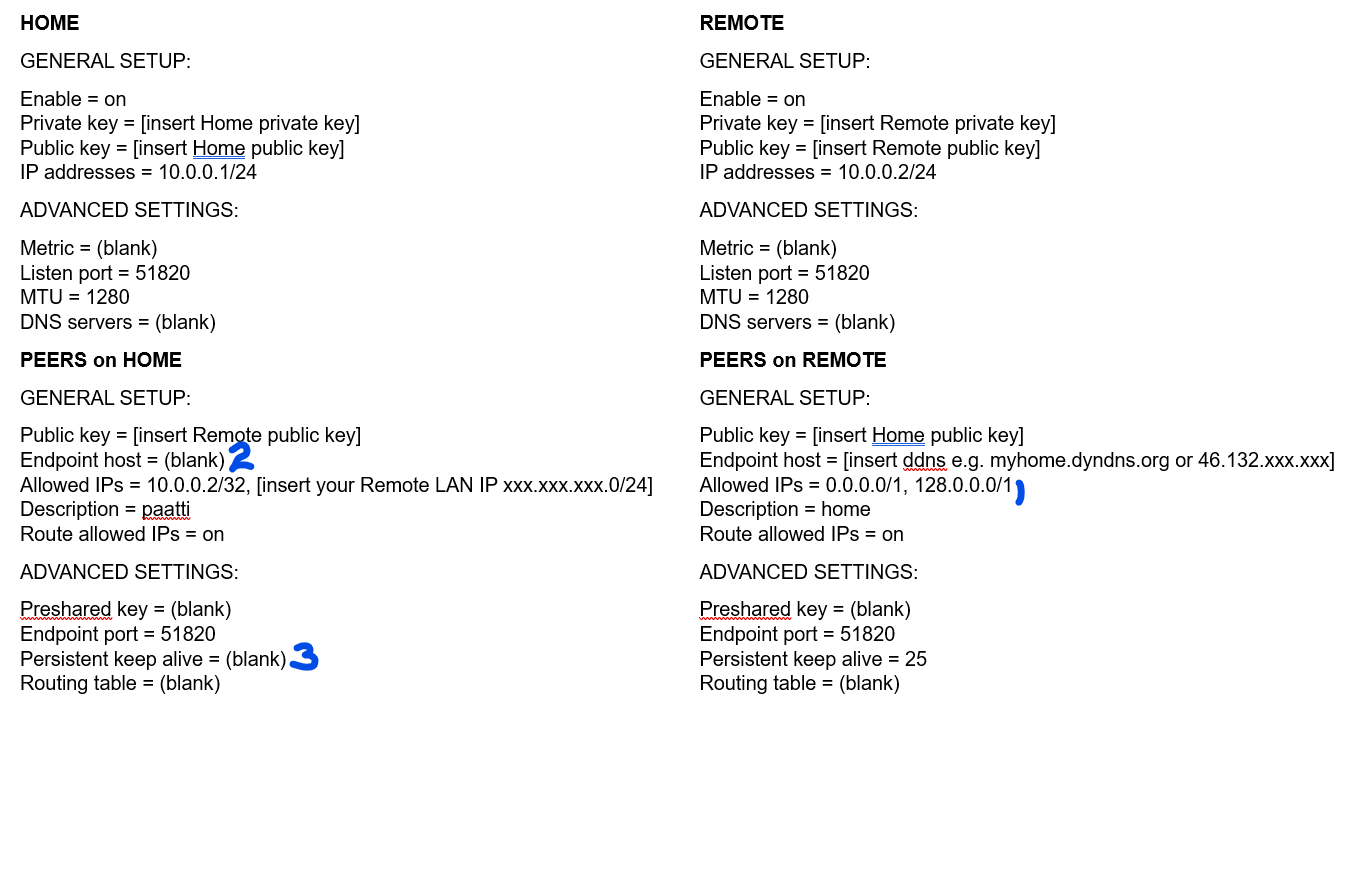
I didn’t say before, but it is IMPORTANT that the LAN IP range is different at each site, so if your Home LAN is 192.168.2.0/24 then the Remote LAN cannot be the same IP range. Change it to something like 192.168.5.0/24, if that’s not used - this is to stop IP overlap between the two locations.
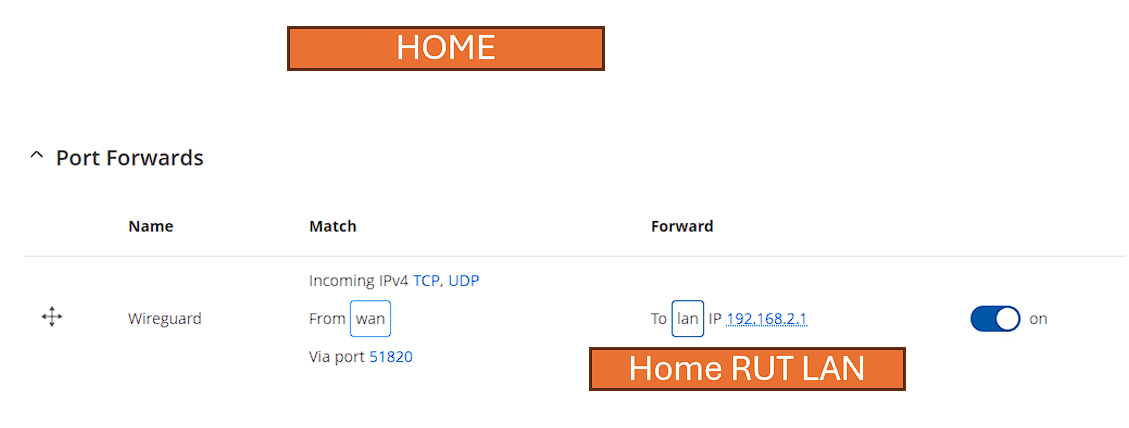
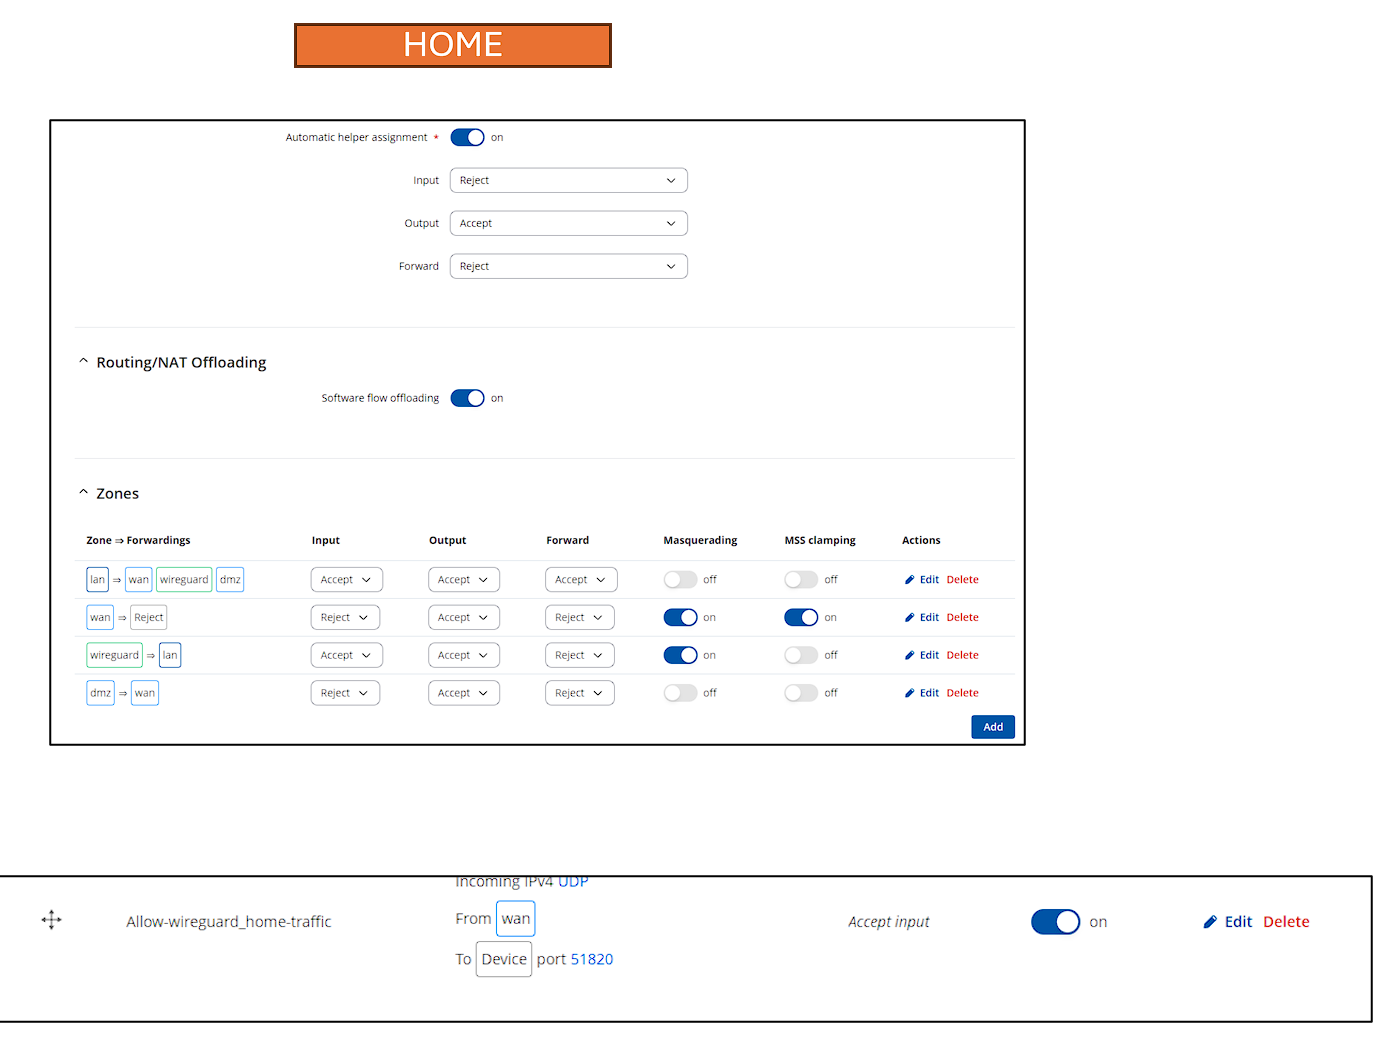
You said … “Port forwarding because there has to be a way for “remote” RUT240 to reach “home” RUT955” … no need for port forwarding, this is mostly controlled through the “Allowed IPs” on the Peer settings, giving access to the MQTT broker IP from the remote IoT device IP’s.
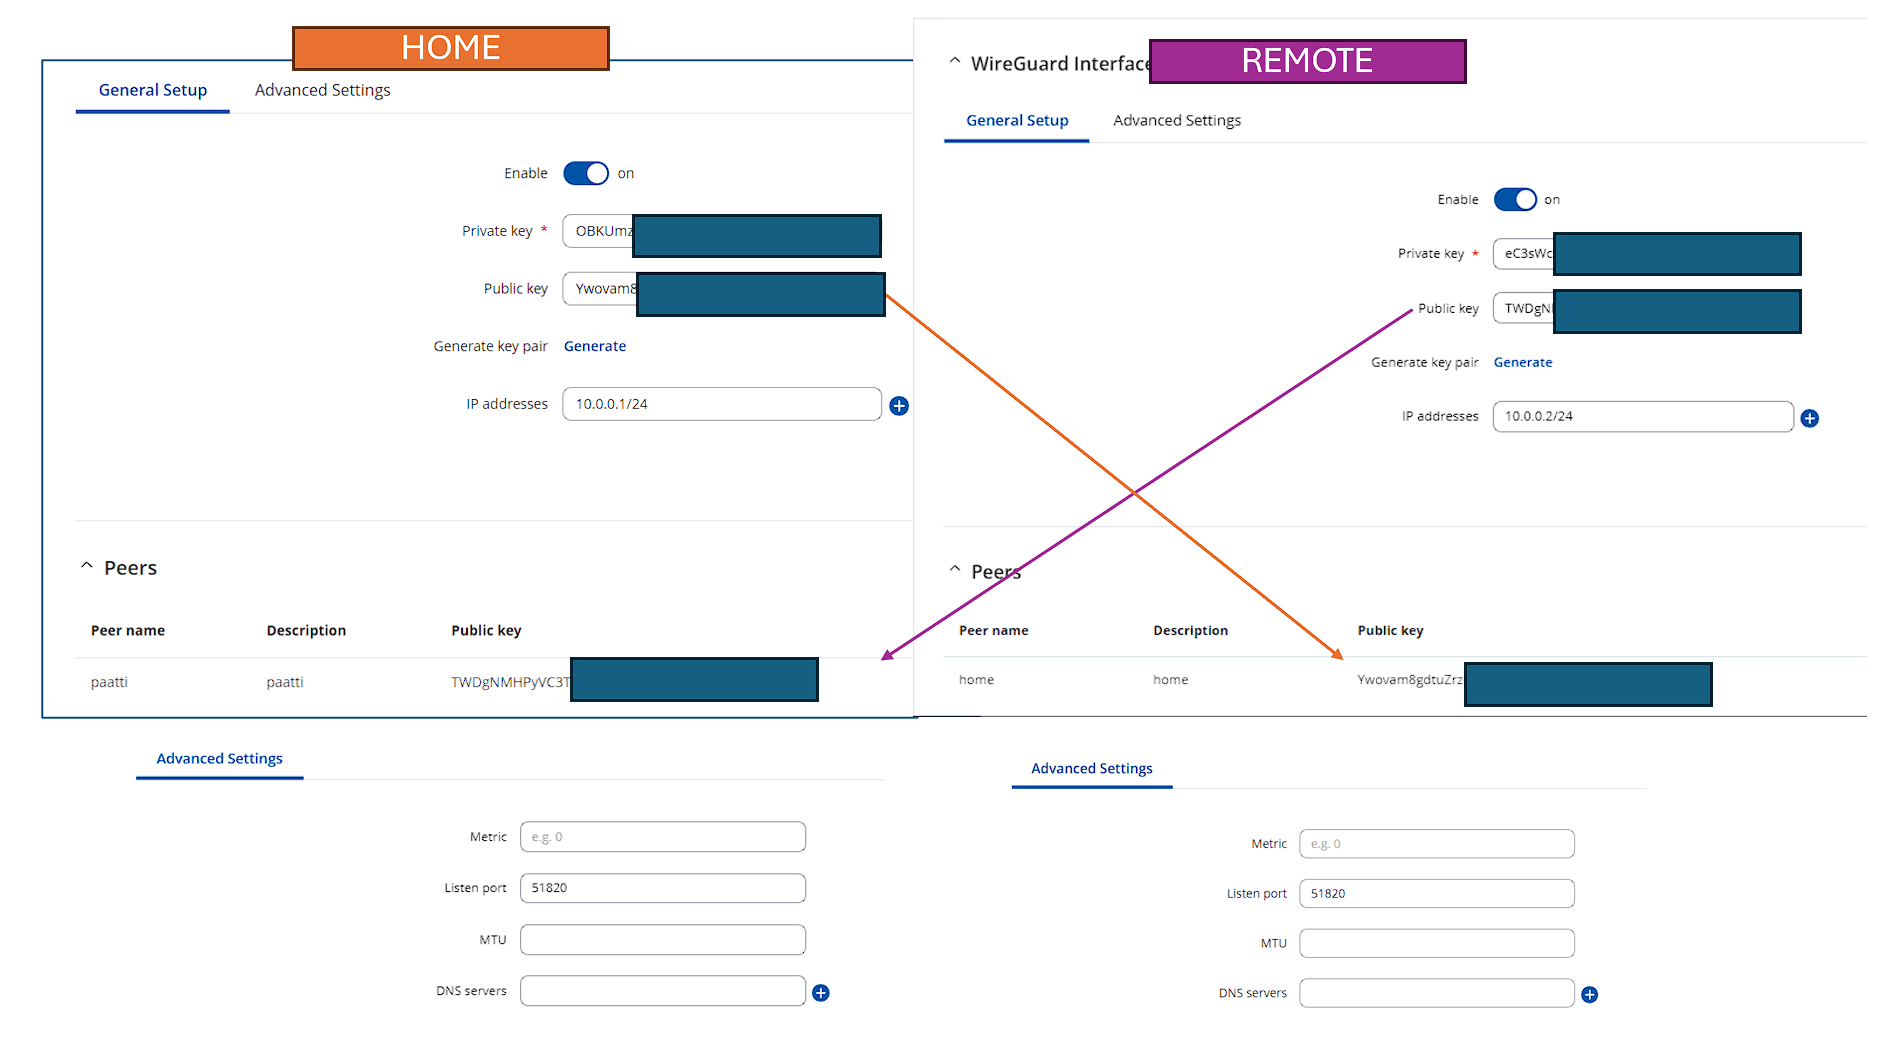
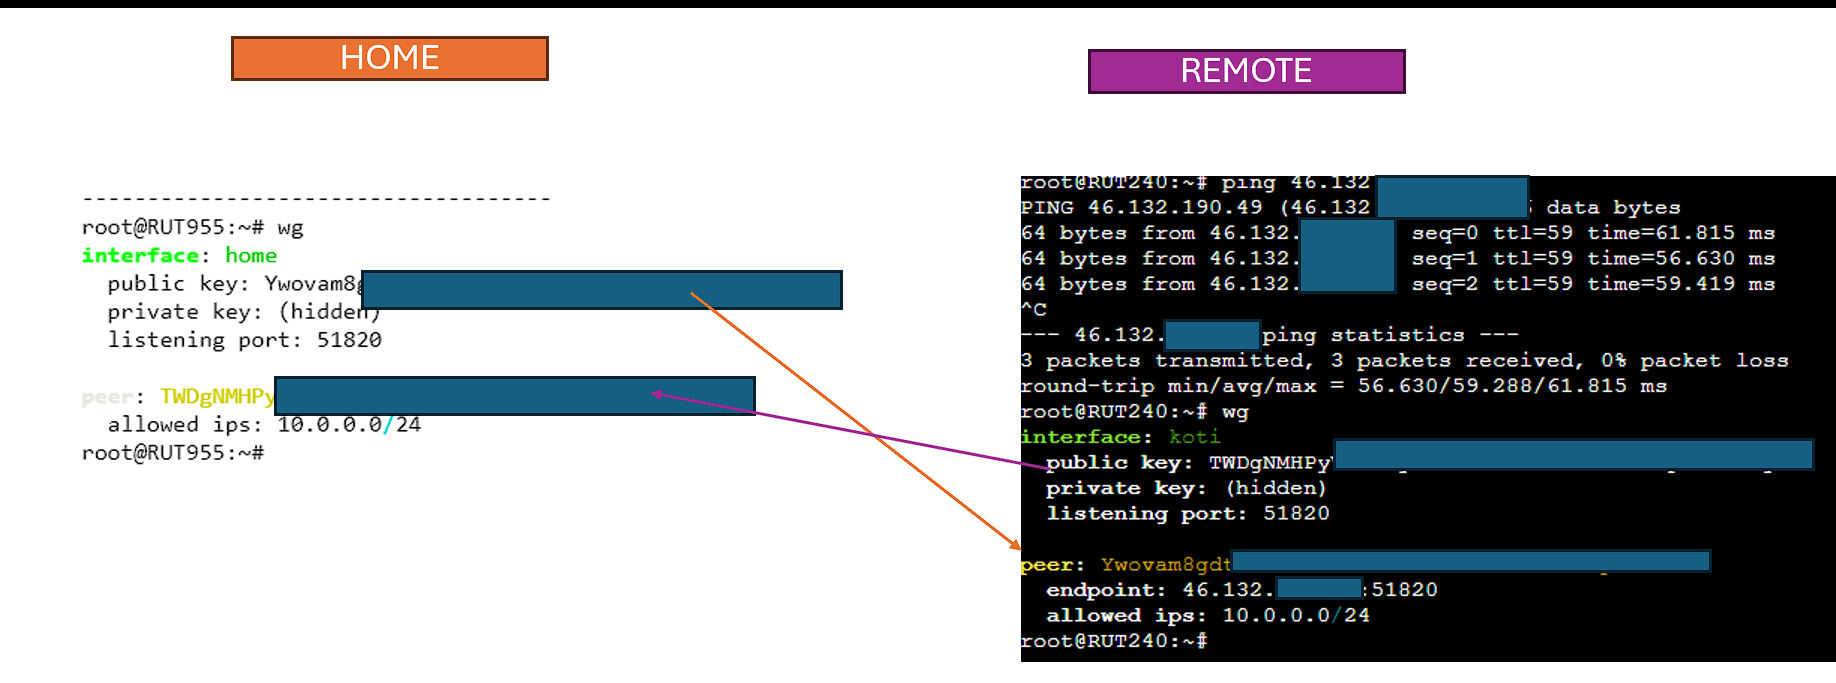
OK, as another example, here are some settings that I use, on some use cases, for site-2-site. It allows access from any IP (v4) at the Home location to the Remote LAN, if your Home and Remote firewall allows it (1). You will also find that, as far as the outside world is concerned, your Remote Public IP will appear to be the same Public IP as your Home location, whilst the Wireguard tunnel is active.
The settings also take into account that the Remote device does not have a Public IP (2).and that you have a wired WAN connection at Home (3)
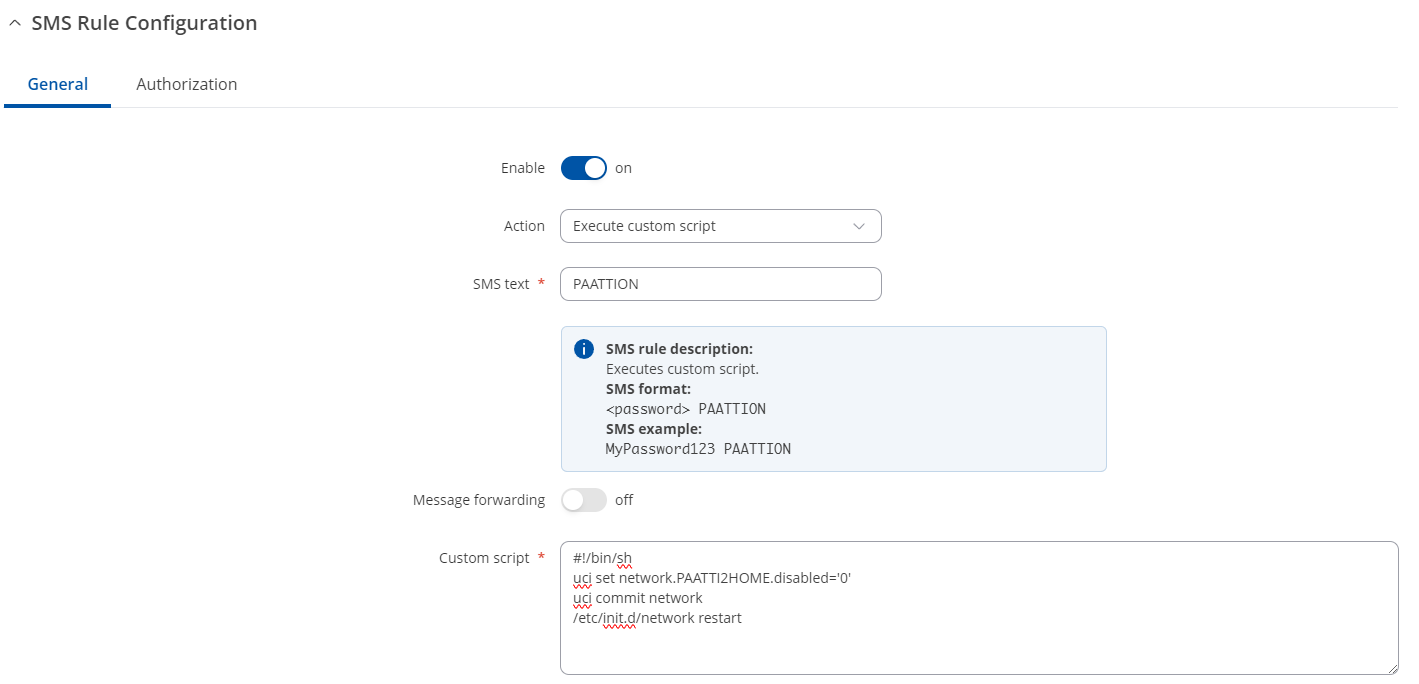
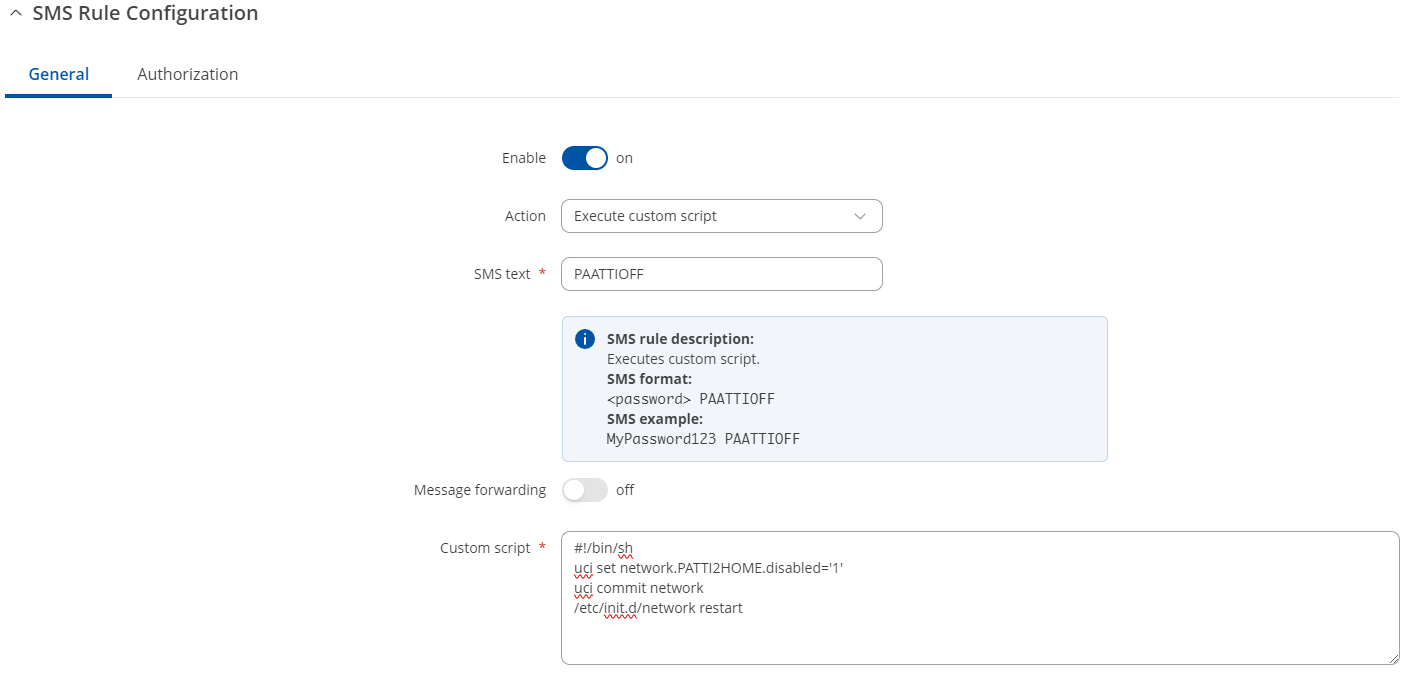
As the only public IP is on your Home device, then the Wireguard tunnel has to be initiated from the Remote device. You can force the Remote device to initiate a connection by sending it an SMS, and I’ll deal with that in a separate post.
The settings below are for IPv4 addresses only. It also assumes your Remote IoT devices are sitting on your Remote LAN, hence the instruction of [insert your Remote LAN IP xxx.xxx.xxx.0/24]. If not, you could also add the relevant entry to the Allowed IPs.
I should add, I’m no Wireguard expert but it works with my RUTX, remote with no Public IP, communicating with a Home, non Teltonika device with a Public IP
.