Greetings,
Thank you for sharing the topology.
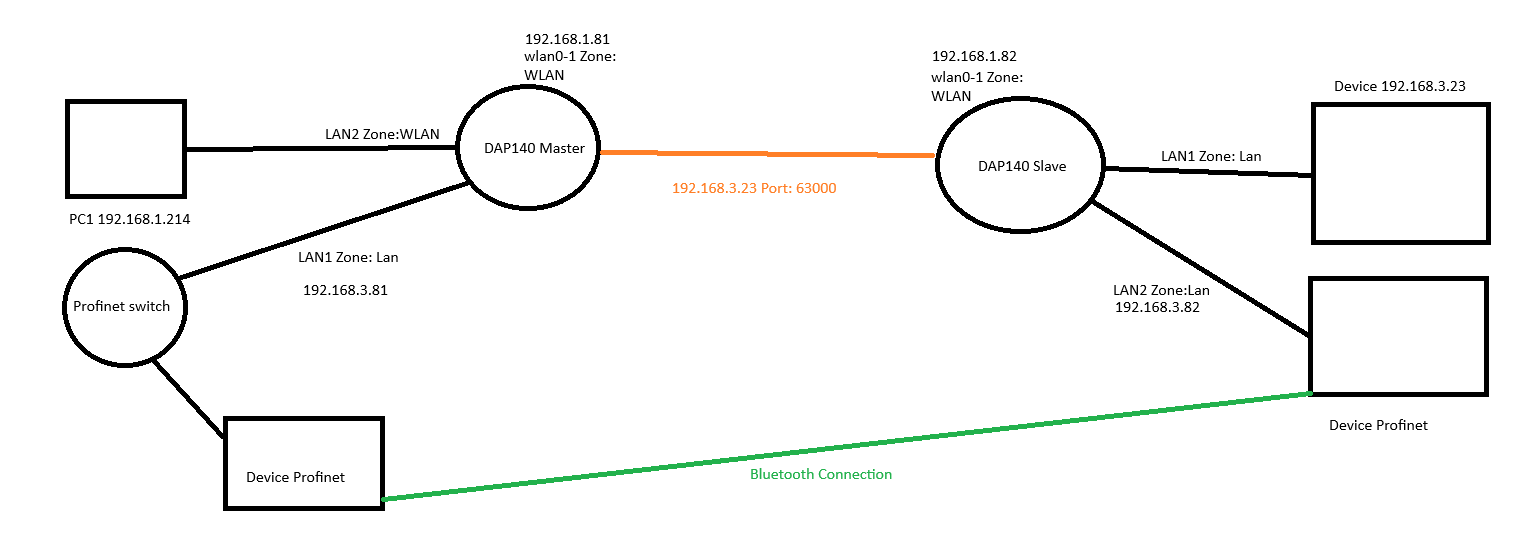
Here’s my understanding of your setup:
You have two DAP140 devices — one configured as a WiFi access point (Master) and the other as a client (Slave) connected to it. Your goal is to enable Layer 2 communication within the 192.168.3.0 subnet, while allowing only the device with IP 192.168.3.23 to access the 192.168.1.0 subnet through port 63000.
This can be achieved by using VXLAN for Layer 2 tunneling and traffic rules for access control.
You can find additional information in the following articles: VXLAN Configuration Example - Teltonika Networks Wiki
Firewall traffic rules - Teltonika Networks Wiki
If I misunderstood something, please let me know, however if that is what you want to achieve, follow these instructions.
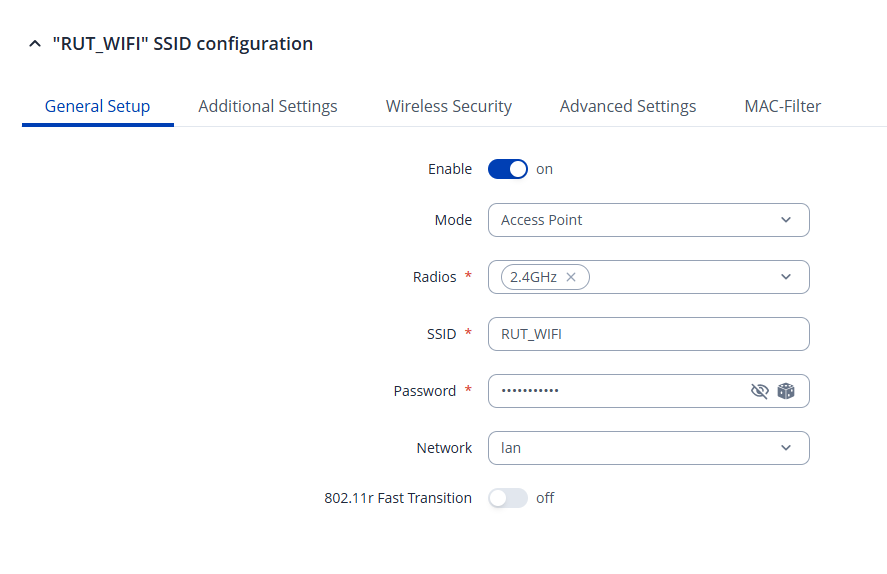
The DAP140 Master should have the wifi set up like an access point.
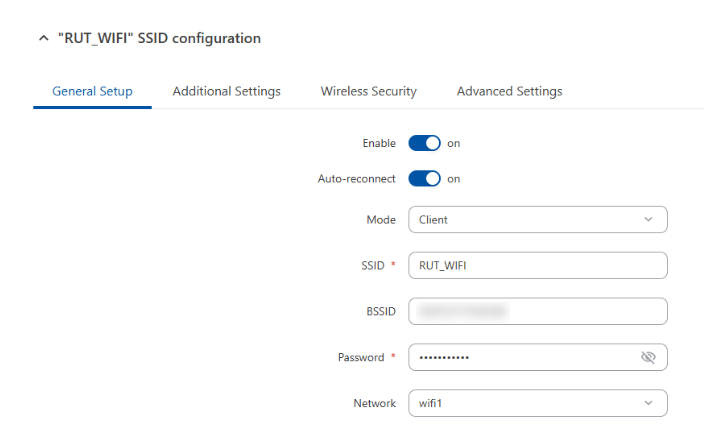
The DAP140 Slave should connect to the access point as a client (WiFi WAN example - Teltonika Networks Wiki)
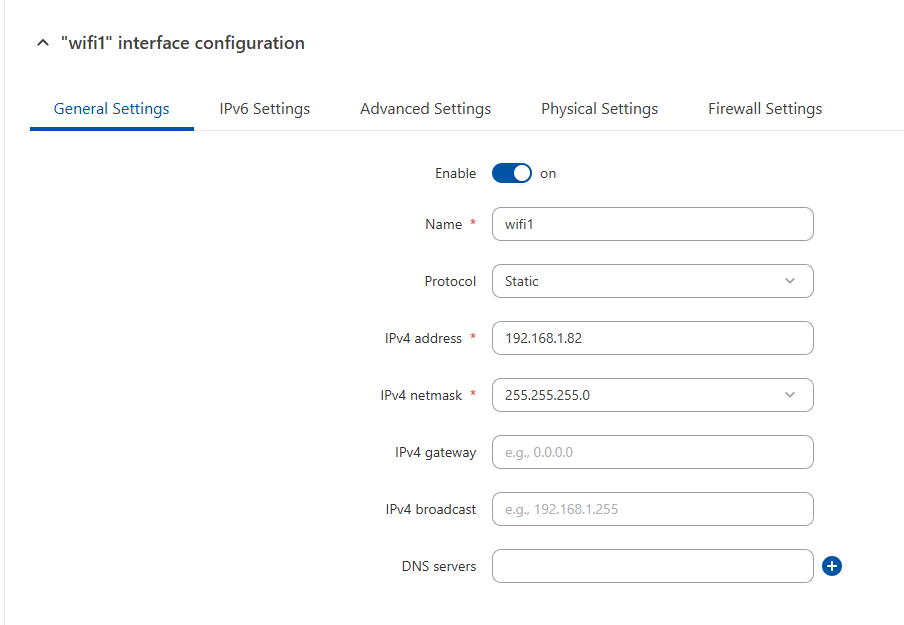
Once connected, a new WAN interface will appear. Configure this interface as shown in the image.
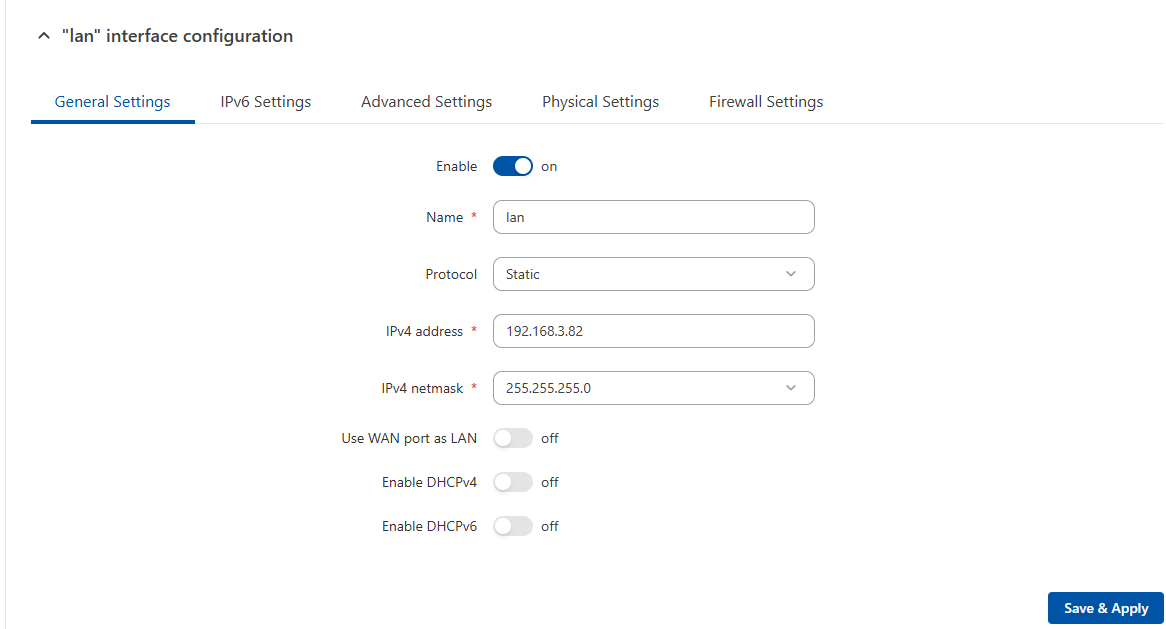
Then go to Network → LAN and click edit on the LAN interface, configure it as shown in the picture.
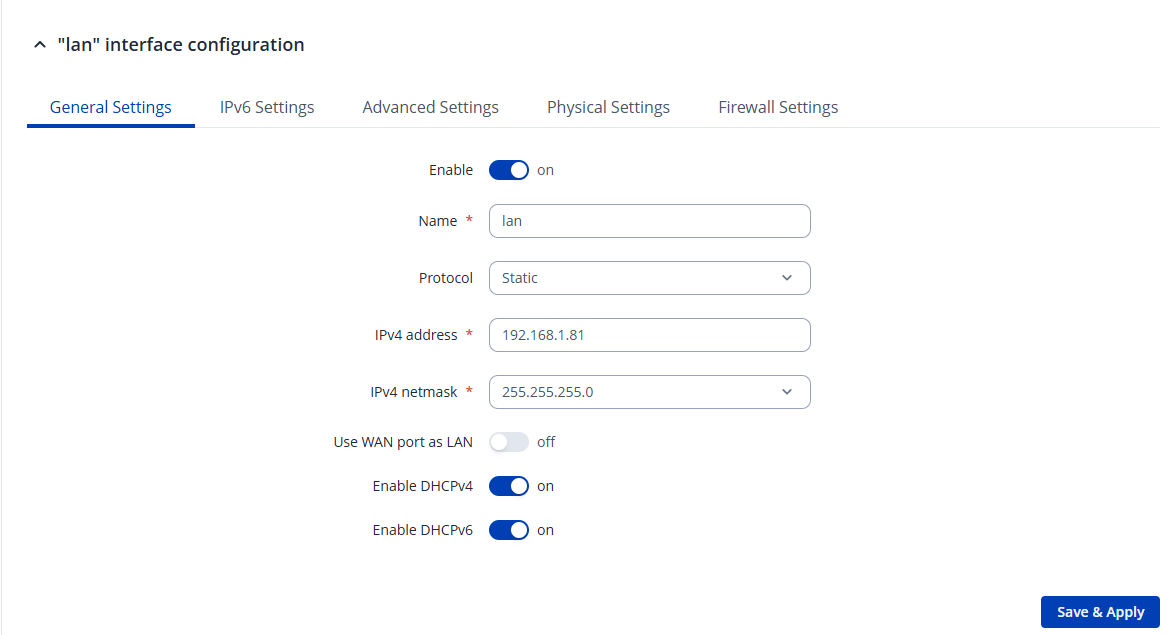
Coming back to the Master configuration, go to Network → LAN and configure the LAN interface as shown in the picture
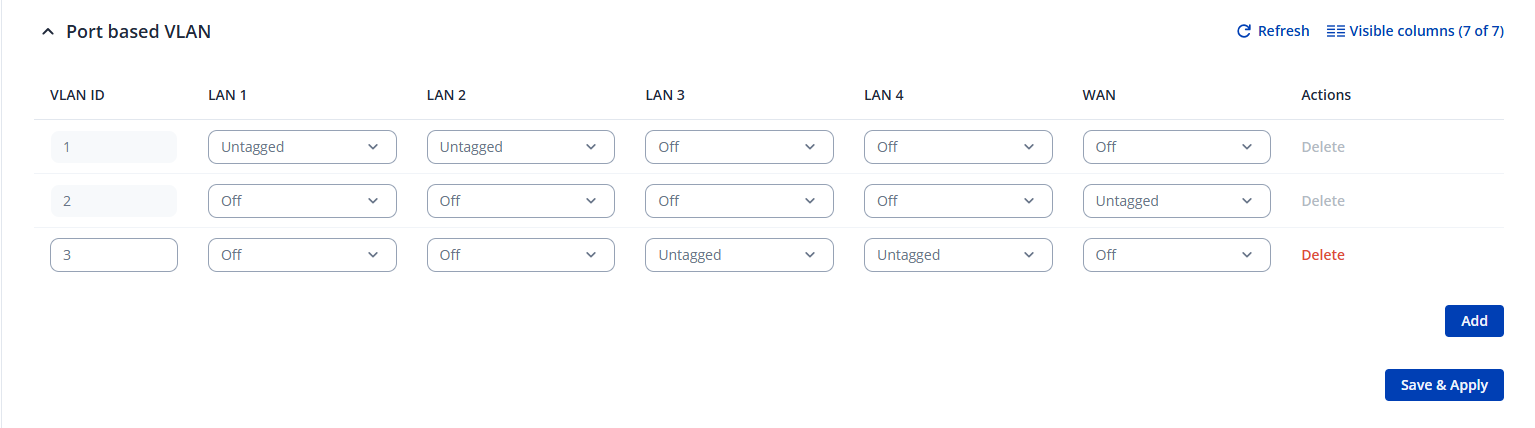
Then you need to create a VLAN on the Master (for this example, we’ll use Port-Based VLANs), navigate to Network → VLAN → Port Based, click Add, and select the ports that should belong to the 192.168.3.0 subnet as Untagged.
Here is how it would look if LAN ports 1 and 2 had the 192.168.1.0 subnet and ports 3 and 4 the 192.168.3.0 subnet.
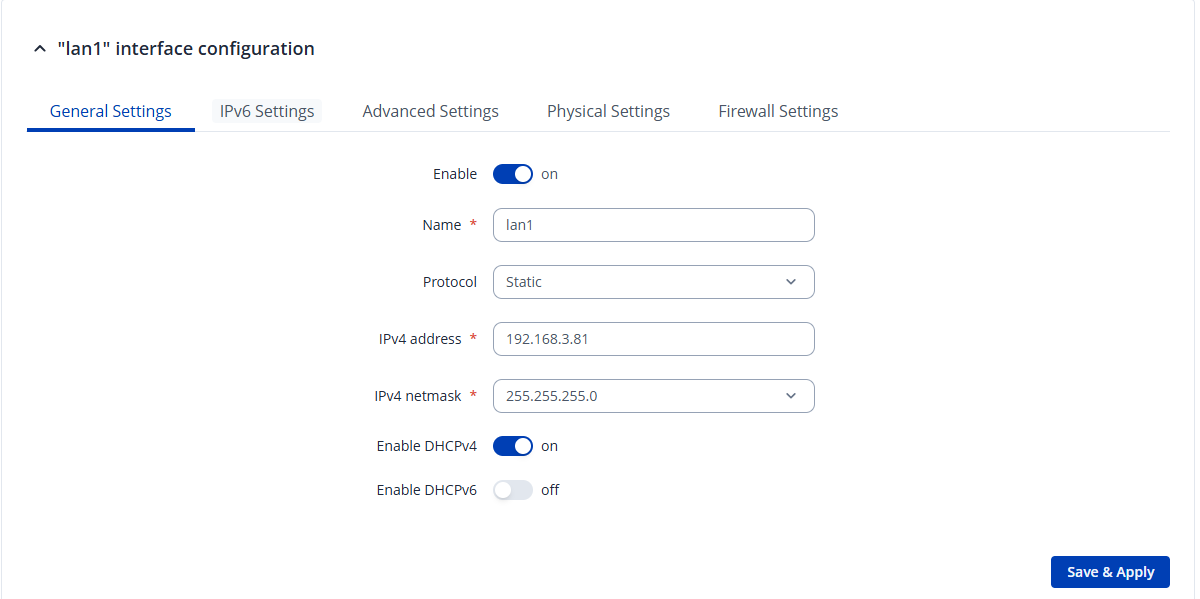
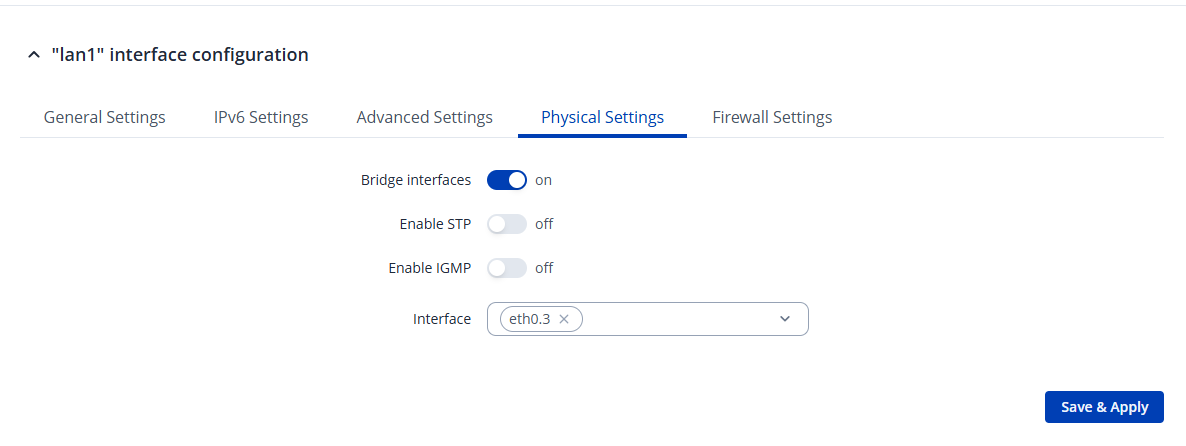
Then go to Network → LAN and add a new interface, configure it like shown in the pictures.
Now we will configure the VXLAN. Go to System → Package Manager, select VXLAN, and install it. Once installed, restart the network when prompted.
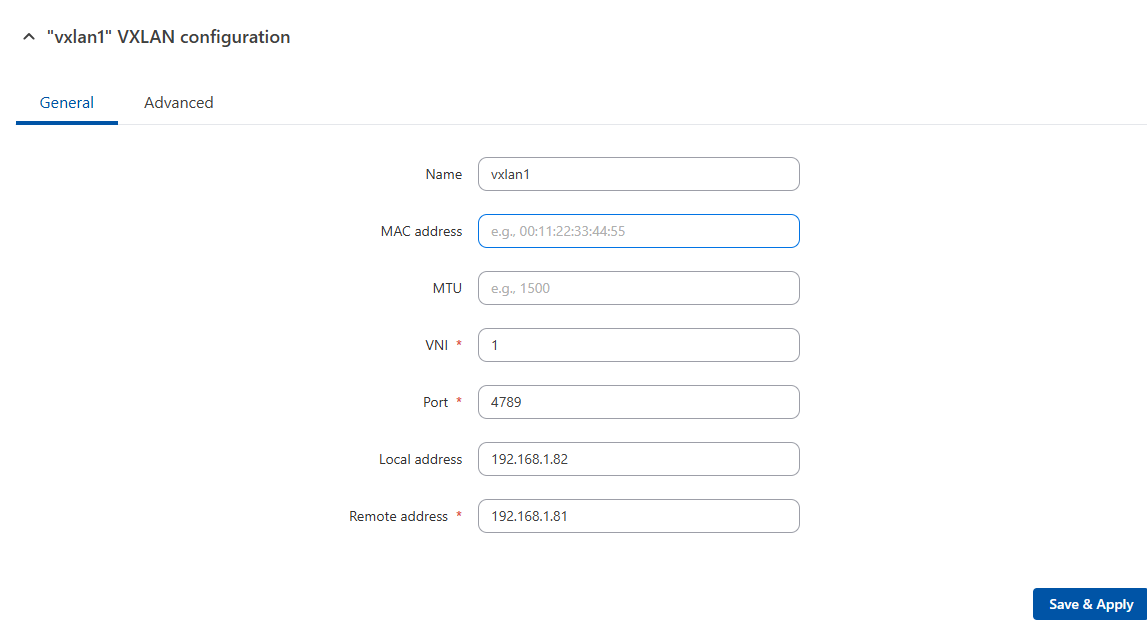
Next, on the master device, go to Network → Devices and add a new VXLAN. Configure it as shown in the picture.
Repeat the same process on the Slave device, adjusting the addresses accordingly.
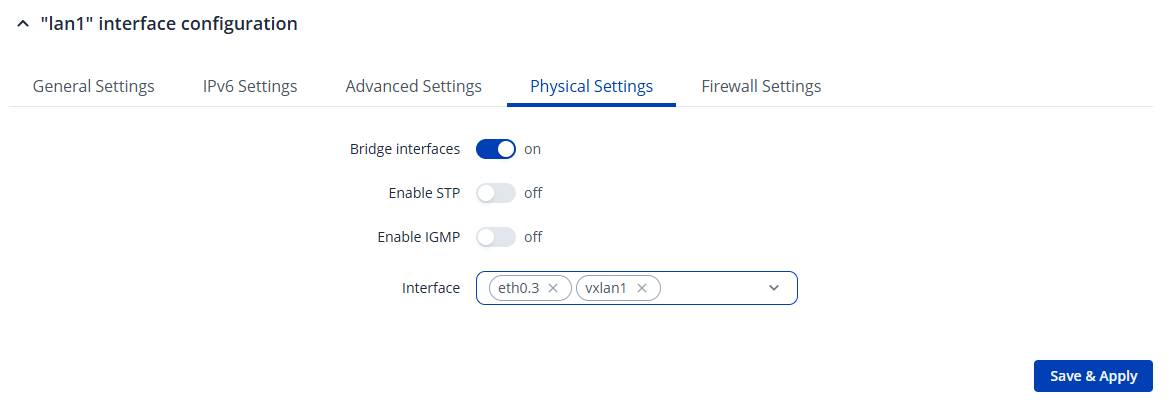
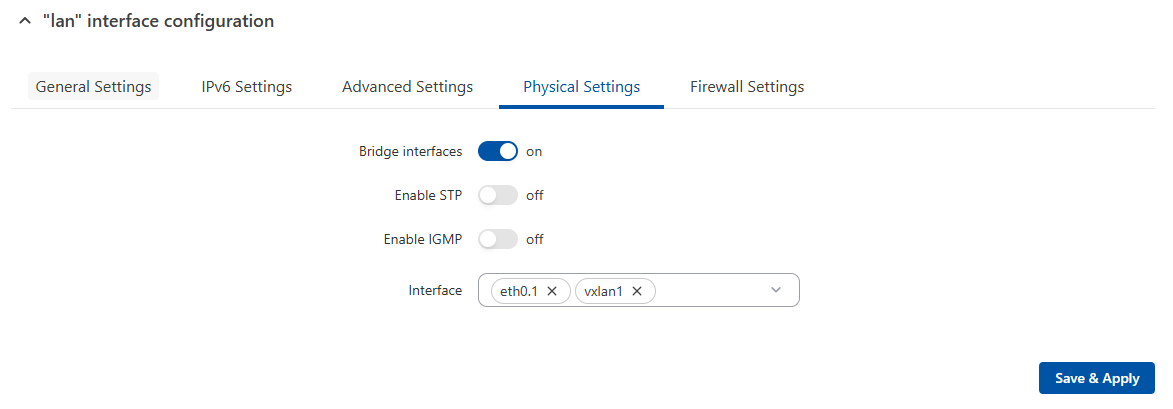
Now we need to apply the VXLAN, on the master device go to Network → LAN, select the newly created, go to physical settings and add the vxlan interface.
Do the same for the LAN interface on the slave device
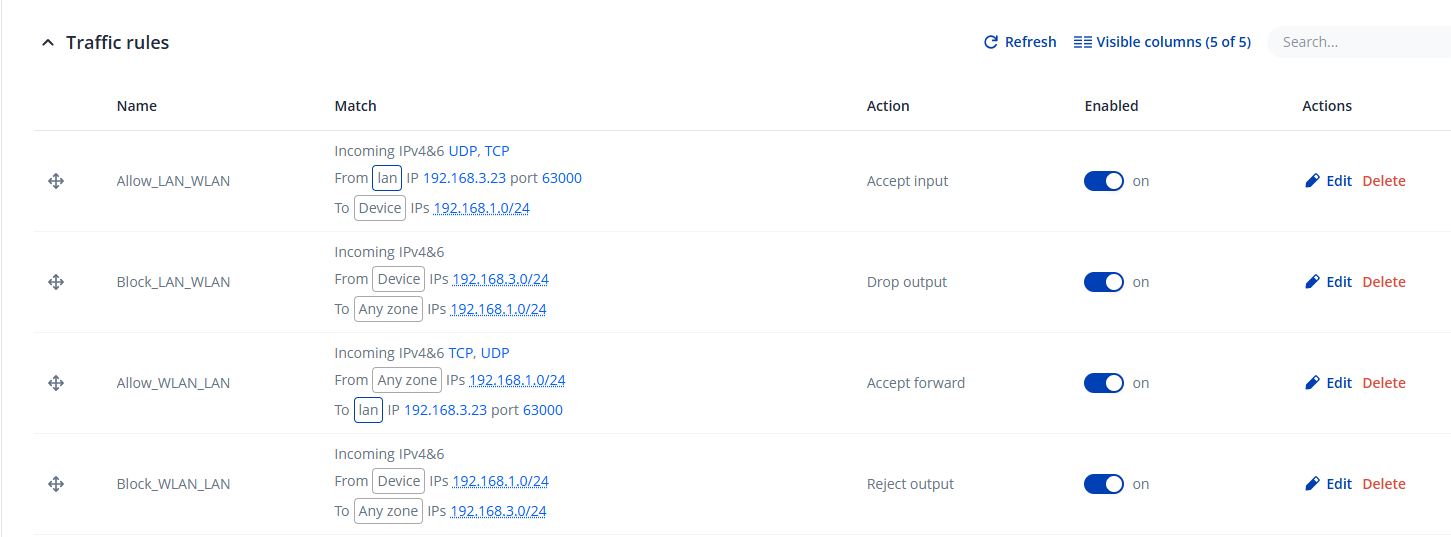
To isolate the WLAN and LAN networks and only allow traffic from 192.168.3.23 to the 192.168.1.0 subnet on port 63000, create specific firewall rules on both devices (same 4 rules on both devices).
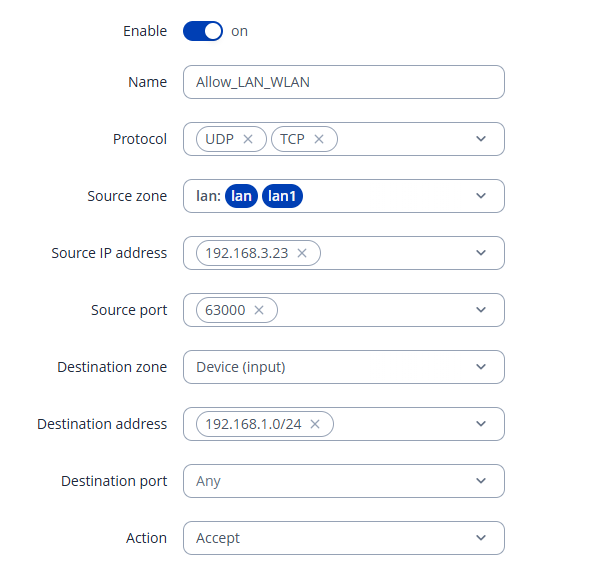
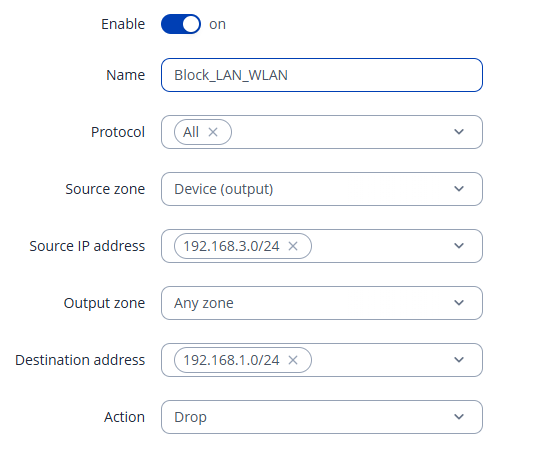
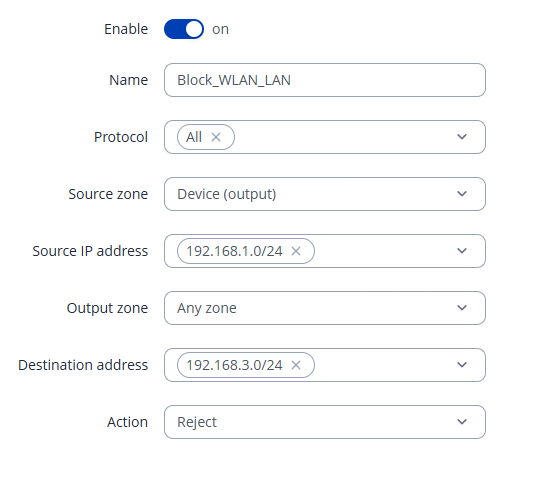
Go to Network → Firewall → Traffic Rules, create the rules as shown in the pictures, make sure the rules are placed at the top in the correct priority order.
Here are the rules:
Best Regards,
Justinas